Tesla Model Y: Attaching Upper Tether Straps
If an upper tether strap is provided, attach its hook to the anchor point located on the back of the second and third row (if equipped) seats.
NOTE: The location of anchor points may not be readily visible but can be found by identifying a slice in the seat's material.
WARNING: Tighten upper tether straps according to the instructions provided by the manufacturer of the child safety seat.
WARNING: USE ONLY SEAT BELT RETAINED CHILD SAFETY SEATS IN THE CENTER SEATING POSITION.
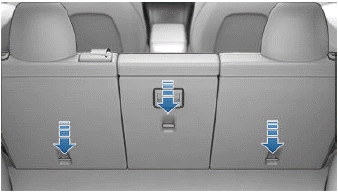
Make sure the hook is fully seated on the anchor point.
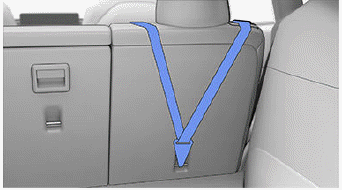
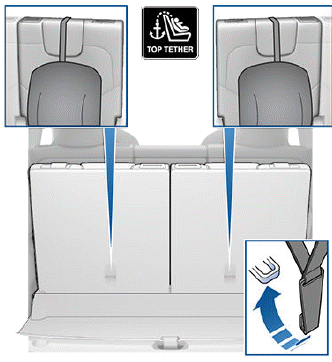
For dual-strap tethers in the second row, position a strap on each side of the head support.
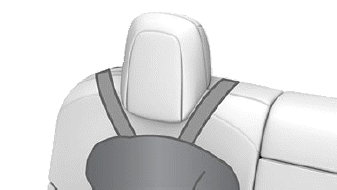
For dual-strap tethers in the third row (if equipped), position both straps over the head support.
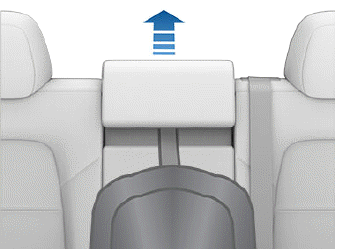
WARNING: Before running a tether strap OVER a head support, you MUST LOWER the head support.
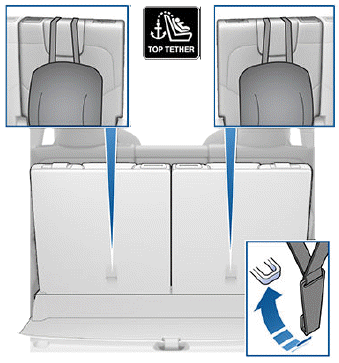
For a single-strap tether at an outboard seating position in the second row, raise the head support (see Head Supports) and run the strap under the head support.
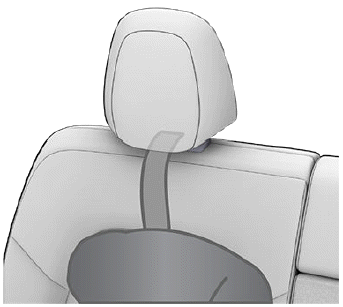
For a single-strap tether at the center seating position, raise the head support (see Head Supports) and run the strap under the head support.
For a single-strap tether in the third row (if equipped), position the strap over the head support.
READ NEXT:
 Testing a Child Safety Seat
Before seating a child, always make sure the child safety
seat is not loose:
1. Hold the child safety seat by the belt path and try to
slide the safety seat from side to side and front to
back.
2.
Location of Airbags
Airbags are located in the approximate areas shown below. Airbag warning
information is printed on the sun visors.
Model Y is equipped with an airbag and lap/shoulder belt at both front seating
pos
SEE MORE:
Before Driving
When snow and ice accumulate on your vehicle, moving
parts, such as the door handles, windows, mirrors, and
wipers can freeze in place. To achieve maximum range
and performance, it is helpful to warm the cabin and
Battery before you leave. There are several ways to do
so:
Touch Schedule, avai
Pedals & Steering
Acceleration Adjust the amount of acceleration. Chill
limits acceleration for a slightly smoother and gentler
ride, whereas Sport provides the normal level of
acceleration. (See Acceleration Modes).
NOTE: When Chill is selected, Chill displays on the
touchscreen above the driving speed.
Steerin
